How To Choose Parts For Pedals
If you're looking to purchase parts to build your first DIY pedal, the options available can be quite overwhelming! Luckily, with a little experience and getting over the plateau of getting the first pedal sorted out, it becomes a lot simpler. Here's a crash course on how to choose parts whether you are purchasing from us or another supplier.
That said, if you're looking to build your very first pedal, I highly recommend starting with a kit. It takes the guess work out of choosing and gives you that hands on experience too see for yourself what all is necessary to go into a pedal.
RESISTORS
Resistors are components with two legs that resist the flow of current. They are measured in the amount of ohms (Ω).
For most DIY pedals out there, you're going to be using "standard" 1/4 watt, axial resistors, typically of the metal film variety with a 1% tolerance. Some projects will call for 1/8 watt which are about half the size.
Tolerance % specifies how close the actual measured resistance is compared to the labeled value. Example, a 1% 10k resistor may be anywhere between 9.9k and 10.1k.
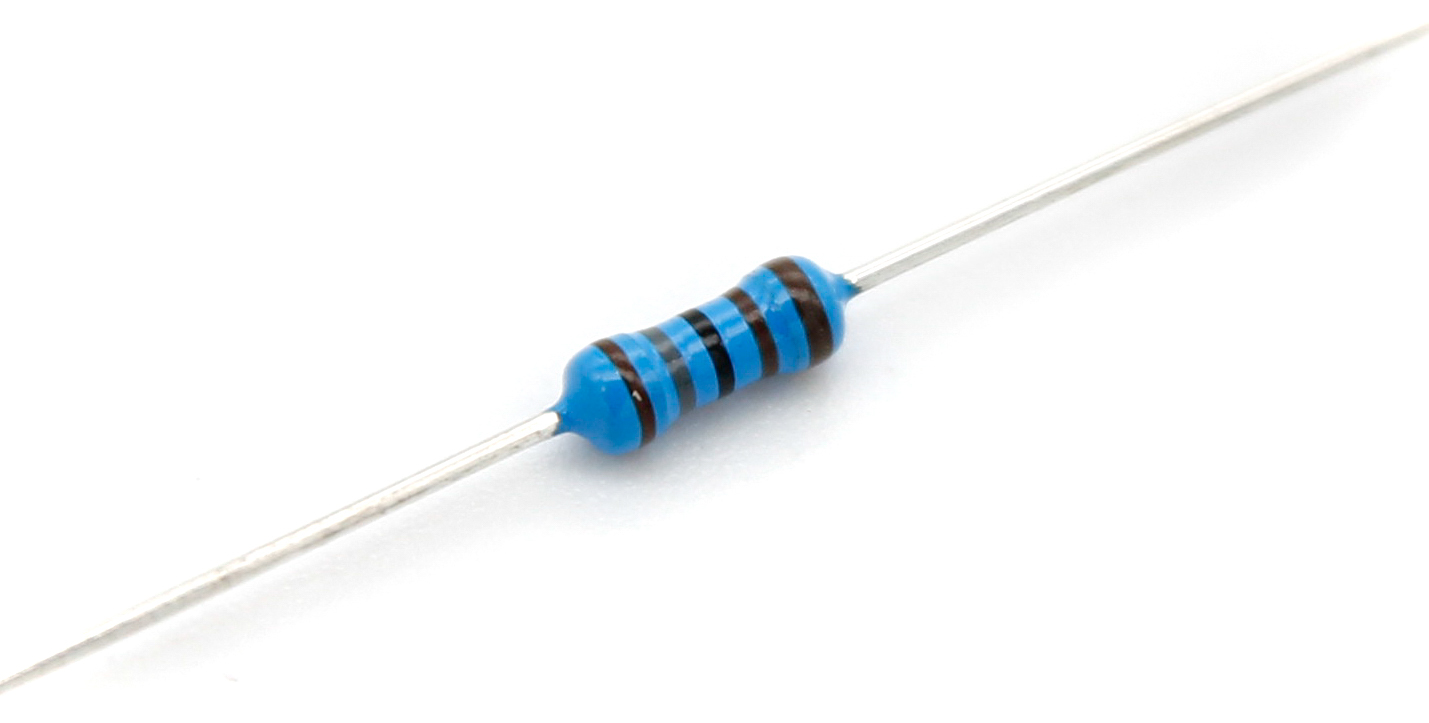
A standard 1/4w 1% resistor
Capacitors are parts that hold a charge. Their capacity is measured in ferads, signified by the symbol F. People will frequently call them "caps" for short. Values for pedals are usually in the picoferad (pF), nanoferad (nF), or microferad range (uF). 1000pF = 1nF = .001uF
There are a lot of different types of capacitors and they have their own uses, while also having quite a bit of overlap. Below are a few generalizations for which type of capacitors you should choose depending on what the project calls for.
MLCC: 1pf-1000pf
Film: 1nF - 1uF
Aluminum Electrolytic: 1uF and up
MLCC stands for Multi-Layer Ceramic Capacitors. They are typically small value capacitors. You can also get single layer ceramics, but they are noisier with a looser tolerance. Looks for parts with a 2.5mm pitch (pitch is the distance between each leg), and a voltage range of 50-100v.
Film capacitors are the ones you'll use the most, and have the best sonic characteristics for audio pathes. Use film caps whenever you can. Box style film capacitors are the most common ones you'll use. Epoxy dipped poly metal film is also totally acceptable, and have a cool rounded red appearance. 5mm pitch (distance between each leg) is by far the most common spacing in pedals. Looks for film caps in the 35-100v range. Over 100v film caps will usually be too big for pedals and can be an unpleasant surprise when they arrive if you chose the wrong voltage. 5% tolerance is preferred, but 10% is almost always completely fine.
Aluminum Electrolytic is the other most common capacitor you'll use. These are usually higher capacitance parts above 1uF, but not always. They look like little cylindrical cans. They are frequently used for power filter, but are sometimes in the audio path. Look for 2mm to 2.5mm pitch. Choose a voltage at least double the voltage your pedal takes, but this can be tricky if your pedal uses a charge pump (example, the Klon takes 9v, but internal charge pump produces a difference of 27v). For the most part, if you choose electrolytics between 35v-100v it should fit in your pedal, but double check size on high capacity (47uF+) caps. High capacity caps can start getting very large with voltage increases. "Standard" smaller value aluminum electrolytic capacitors are 5mm diameter in pedals, large values (47uF+) can be 6.3mm-8mm. We carry standard pedal values and sizes on our website.
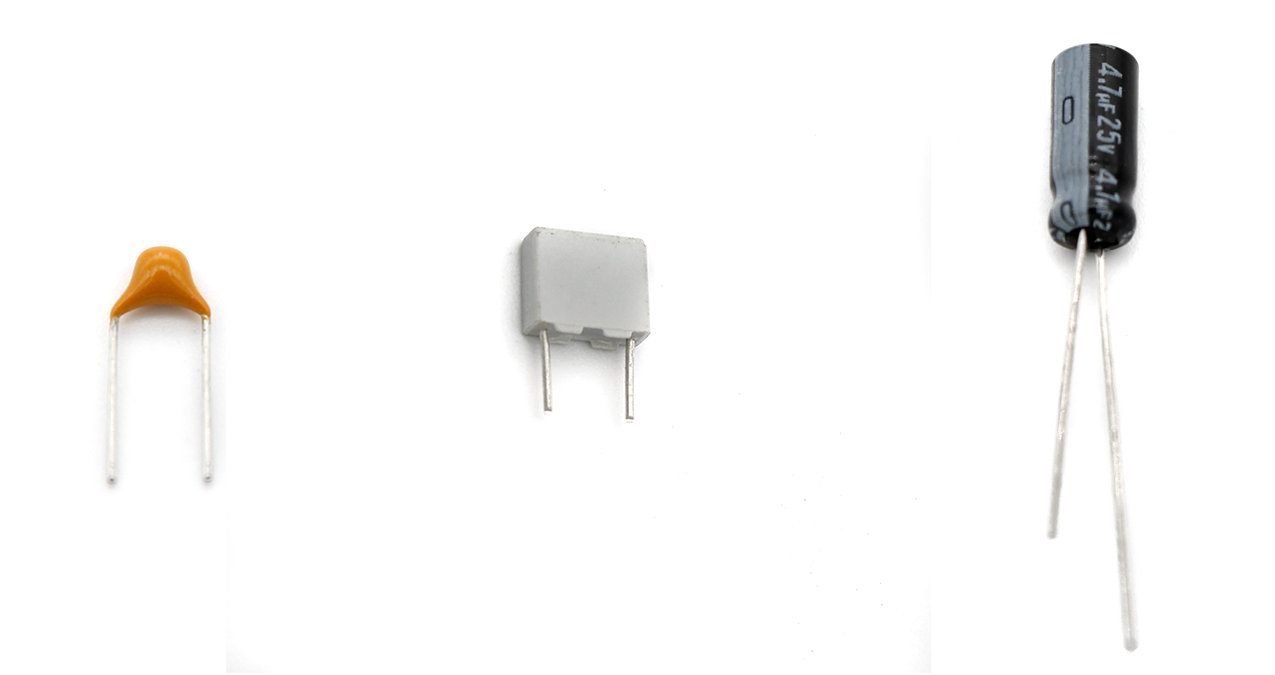
MLCC (left), box film (middle), aluminum electrolytic (right)
DIODES
Diodes are semiconductor components that only allow current to flow in one direction. They have two legs, with one end called the anode (where current can flow in) and the cathode (where current flows out). The cathode end is (almost always) marked by a band or line.
Common silicon diodes are 1n4148, 1n914, and 1n4001. These are bread and butter diodes found in a million pedals for clipping, circuit protection, etc
Germanium diodes are long standing favorite for clipping diodes. They have a warm, natural breakup. Common part numbers are 1n34a, 1n60. They slightly larger than a silicon diode and inside the glass body you can see a cat whisker and germanium pellet.
Schottky diodes have a low forward voltage drop and fast switching speed, making them great choices for in-line circuit protection without voltage starving the circuit. Can also be used for clipping. The 1n5817 is very common for circuit protection.
Zener diodes are usually used to assist in voltage regulation.
LEDs are Light Emitting Diodes. We'll cover these more a section down.
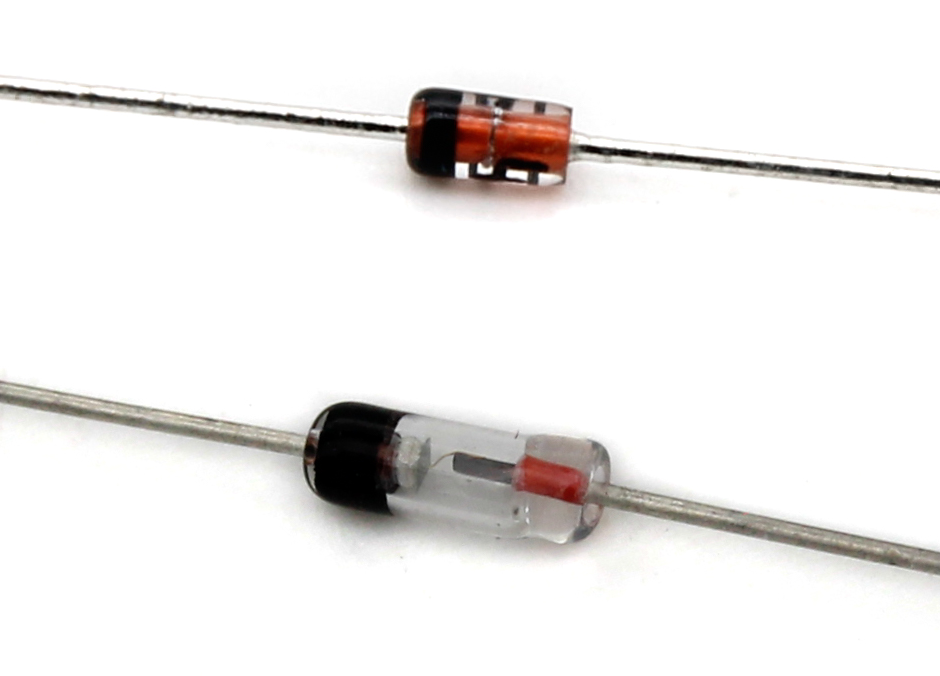
Silicon diode (top), germanium diode (bottom)
LED
LED's are diodes, light emitting diodes! They are two legged semiconductors and just like other diodes, have an anode and a cathode. They can be used for clipping (they are very loud!), but most commonly used for the indicator light so you can see that your pedal is ON!
They come typically come in 3mm and 5mm varieties. They are functionally the same, just different sizes. The two common varieties from there are diffused or waterclear. Diffused are usually dimmer, the bulb itself is colored, and the viewing angle is wide. Waterclear is usually has a clear bulb, very bright if looking directly at it, and a narrower viewing angle.
Use of a bezel may be required depending on where the LED hole is and if the LED is mounted directly to the PCB. Bezel's also add style to the pedal. If using an LED not soldered directly to the PCB (you are running wires to the LED), you will need a bezel to hold the LED. Some bezels have the LEDs clip in, or with a rubber stopper. Others will require a drop of glue, hot glue, or epoxy to keep the LED in place in the bezel.

3mm diffused red (left), 5mm diffused colors (mid), variety of bezels (right)
TRANSISTORS
Transistors are three leg semiconductor components with a variety of purposes. In a pedal they are typically used for amplification and sometimes for switching. You will find them bipolar junction varieties (NPN and PNP) and Field Effect (FET, JFET, MOSFET). Stick with the recommended provided on the pedal circuit you are building.
Germanium transistors are a fun rabbit hole to go down, but not recommended for beginners. They are VERY sensitive to temperate and there are a lot of defective ones if you are buying in bulk. We sell pre-tested and measured germanium transistors, but using them in a circuit can still be quite finicky by nature.

TO-92 transistor
FOOTSWITCHES
Lots of builders will have lots of preferences with these. The most common one you will use in DIY pedals is a 3PDT latching footswitch with solder lugs. If you want a standard heavy click, you cannot go wrong with industry standards like Alpha or Vimex. For a premium soft click option, our PRO series is our most popular option.
There are also PCB pin varieties of the same 3PDT footswitches, but this is less common.
For tap tempo or relay bypass applications, you will frequently be using an SPST footswitch. Check with your project details whether it needs a normally open or normally closed switch. These switches typically have no click.

Vimex 3PDT (left), StompBoxParts 3PDT Pro (mid), SPST Momentary Pro (right)
POTENTIOMETERS
Potentiometers ("pots") are variable resistors, allowing the user to control the resistance for common controls like drive amount, volume, tone, etc. They have three legs, the outer legs act as a standard fixed resistor, the middle leg (called the wiper) is tapped for choosing the amount of resistance between the fixed resistor. Like resistors, these are measured in ohms.
16mm is the most common for most off the shelf DIY applications. That said, smaller 9mm is becoming more popular. PCB Leg pots are for mounting directly to a PCB. Solder lug pots are meant to have wires running to them. Dual gang pots are two stacked pots that move in unison when the knob is turned.
The resistance value (example, 10k) is usually a determined/tested value that has an effective control over that part of the circuit.
The most common potentiometer tapers are A, B, and C. B is linear, or 50% resistance at the halfway point. A/Audio/Log taper is a gradual 15% resistance up to halfway point, then increases resistance drastically after that. C/Reverse audio/reverse log is a rapid 85% resistance up to halfway, then gradual increase beyond.
Knobs attach to pots. You don't need a knob, but a knob gives the pedal personality and character. you must match the pots and knob shaft diameter or style (smooth round, or knurled).
For an extra classy build with 16mm pots, use dust covers to keep any debris out of the pot. Also highly recommended to use dust covers to insulate the back of the pot so that board mounted pots don't short out components on the PCB.
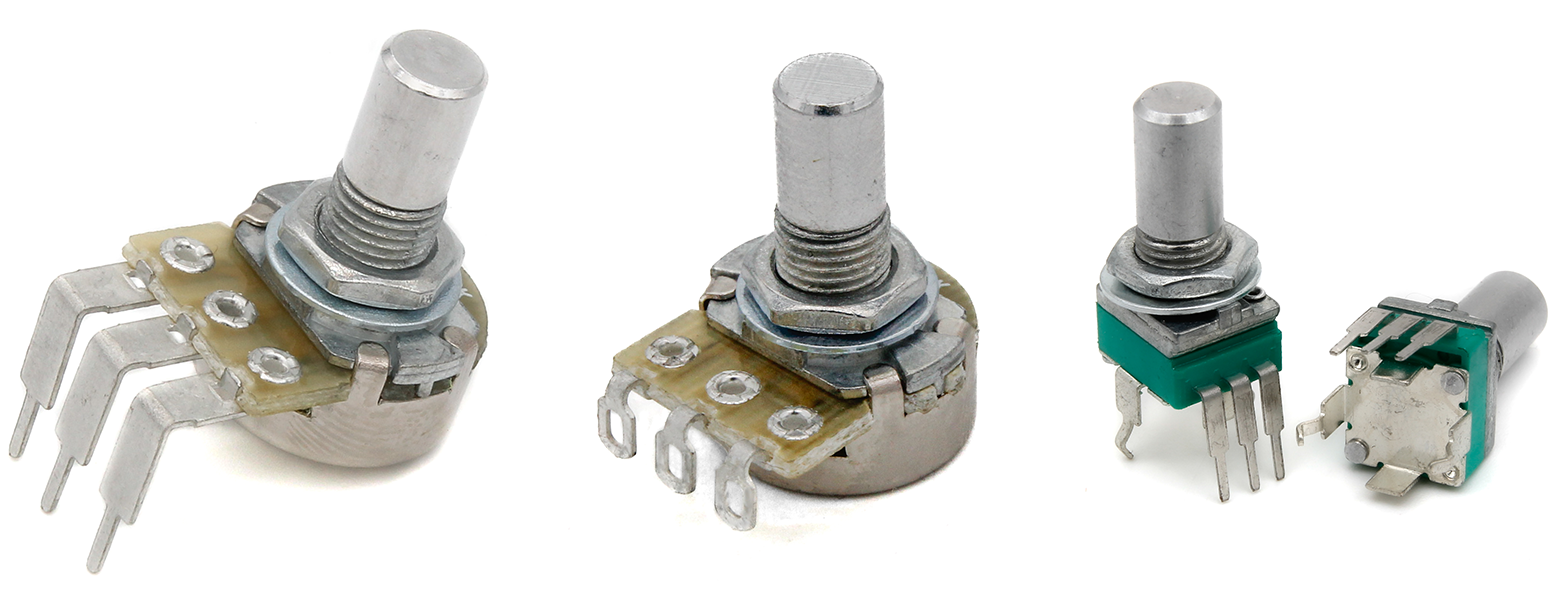
16mm short leg (right), 16mm solder lug (mid), 9mm (left)
DC JACKS
Builders will all have their own preferences here. By far and away the most common in pedals is the 5.5mm barrel with a 2.1mm center pin receptacle. I find that the "innie" and "outie" tend to provide the best connection and are the most reliable over time, but take up the most amount of space. For easier installation, go with the outie as the nut is on the outside of the pedal. If you use innie and need to troubleshoot and remove the circuit from the enclosure, you will have to unsolder the wires.
For builds where space is limited, use a low profile DC jack. Lumberg makes a higher quality low profile DC jack.
Avoid any DC jacks that are all metal. If wiring as a standard center negative, the positive will short to ground and your pedal won't turn on!

Innie DC jack (left), low profile style DC jack (mid), outie DC jack (right)
AUDIO JACKS
Again, there will be lots of preferences here. You can get away with TS (tip/sleeve, sometimes referred to as mono) most of the time. If using a battery and you want it to disconnect when you unplug the pedal, use a TRS (tip/ring/sleeve, sometimes referred to as stereo) and send the battery negative wire to the ring terminal of the jack.
Open frame jacks are very popular for hand builds. We are partial to Neutrik/REAN NYS229 and NYS230 variety, they are very rugged and have stood up to the test of time. For a low profile open frame, checkout the Lumberg KLBM3 and KLB3.
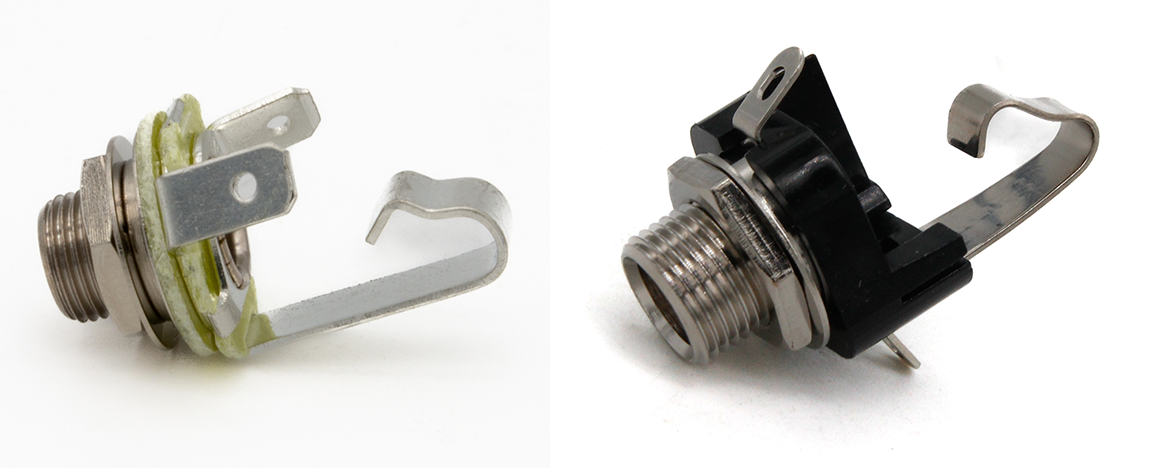
Open frame TS jacks. Neutrik/REAN NYS229 (left), Lumberg KLBM3 (right)
Enclosed panel mounts jacks are a popular alternative to the open frame. Our enclosed panel mount jacks (TS and TRS) have teeth that grab onto the enclosure for a rock solid ground connection!

Enclosed jacks. Panel mount with lock teeth (left), panel mount switched TRS with solder lugs (mid), and Neutrik TRS with PCB pins (right)
